
Beneath the surface of our homes lies a hidden network crucial for preserving the integrity and health of our living spaces—the crawl space ventilation system. Often out of sight and out of mind, this system plays a pivotal role in preventing moisture buildup, deterring mold growth, and ensuring the structural stability of our homes. However, the efficacy of a crawl space ventilation system is heavily dependent on one key practice: regular maintenance. This blog delves into the vital importance of maintaining your crawl space ventilation system, exploring how routine checks and upkeep can ward off costly repairs and extend the life of the system, safeguarding your home for years to come.
Regular maintenance of your crawl space ventilation system is not just a recommendation; it's a necessity. Over time, vents can become blocked, fans can fail, and the overall efficiency of the system can diminish. Without attention, what was once a barrier against moisture and decay can become a liability, inviting the very problems it was designed to prevent. This blog will guide you through the benefits of routine maintenance, highlighting how simple practices can prevent major repairs, improve air quality, and ensure the longevity of your crawl space ventilation system.
From inspecting and cleaning vents to testing mechanical components and ensuring vapor barriers remain intact, we'll cover the essential steps every homeowner should take to maintain their system. Join us as we underscore the importance of regular maintenance in keeping your crawl space dry, your home's foundation strong, and your living environment healthy. Because when it comes to protecting your home, the power of prevention through maintenance cannot be overstated.
The Basics of Crawl Space Ventilation
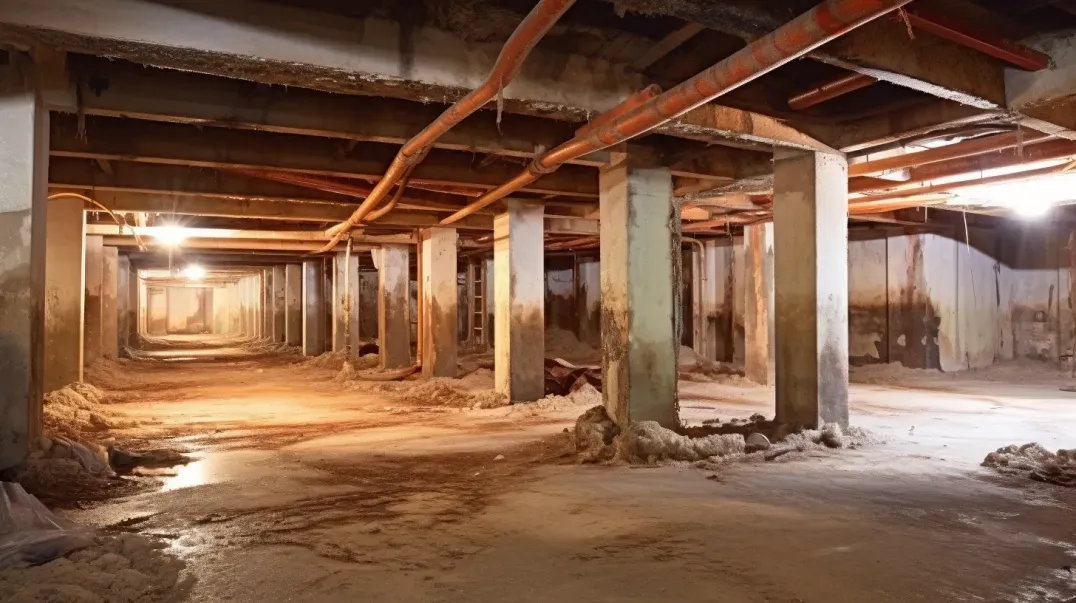
A well-ventilated crawl space is crucial for maintaining the structural integrity of your home and ensuring a healthy living environment. Understanding the basics of crawl space ventilation, including its principles and the types of systems available, is essential for homeowners looking to protect their property from moisture-related issues and improve indoor air quality. This guide delves into how proper ventilation affects your crawl space and home health and explores the various ventilation systems designed to keep your crawl space dry and well-aired.
Understanding Ventilation Principles
Proper ventilation in the crawl space serves several key functions that are vital for the health of your home:
- Moisture Control: Ventilation helps to reduce humidity levels in the crawl space, preventing the accumulation of moisture that can lead to mold growth, wood rot, and attract pests. By allowing outside air to circulate through the crawl space, excess moisture is expelled, safeguarding the home's foundation and structural components.
- Improved Air Quality: The air in your crawl space can significantly influence the overall air quality of your home. Proper ventilation ensures that harmful gases, such as radon, and pollutants are diluted and removed, contributing to a healthier indoor environment.
- Temperature Regulation: Adequate ventilation helps to regulate temperature in the crawl space, preventing extreme cold or heat that can affect the comfort and energy efficiency of your home.
- Understanding these principles underscores the importance of maintaining an effective ventilation system in your crawl space to protect your home and health.
Types of Ventilation Systems
There are several types of ventilation systems designed to address the unique needs of crawl spaces:
- Natural Ventilation: This system relies on air movement through vents placed around the perimeter of the crawl space. Natural ventilation is effective in areas with low humidity levels but may be insufficient alone in more humid climates.
- Mechanical Ventilation: Mechanical systems use fans or other devices to actively circulate air through the crawl space. This type of ventilation can be more controlled and effective in reducing humidity levels, especially in regions with high moisture.
- Vented vs. Sealed Systems: Some homes benefit from a vented crawl space system, where outside air circulates through the space. In contrast, a sealed (or encapsulated) crawl space is completely closed off from the outside, often combined with a dehumidifier to control moisture. The choice between vented and sealed systems depends on climate, home construction, and specific moisture challenges.
- Conditioned Air Ventilation: Another approach involves introducing conditioned air from the home's HVAC system into the crawl space. This method can help regulate temperature and moisture levels but requires careful planning to ensure it does not compromise the efficiency of the HVAC system.
Choosing the right ventilation system for your crawl space is crucial for effective moisture control and maintaining a healthy home environment. Regular inspections and maintenance of your crawl space ventilation are essential to ensure its continued performance and effectiveness.
Signs of Inefficient Ventilation
Efficient ventilation is crucial for maintaining a healthy, comfortable, and safe environment within your home. It prevents moisture-related issues, controls indoor pollutants, and ensures a continuous supply of fresh air. However, recognizing the signs of inefficient ventilation can be the key to addressing problems early, before they escalate into more significant issues. This guide will help you identify the visible signs of poor ventilation and understand how changes in air quality can indicate underlying ventilation problems.
Recognizing Visible Signs
Physical indicators often provide the first clue to recognizing inefficient ventilation in your home. Here are some signs to look out for:
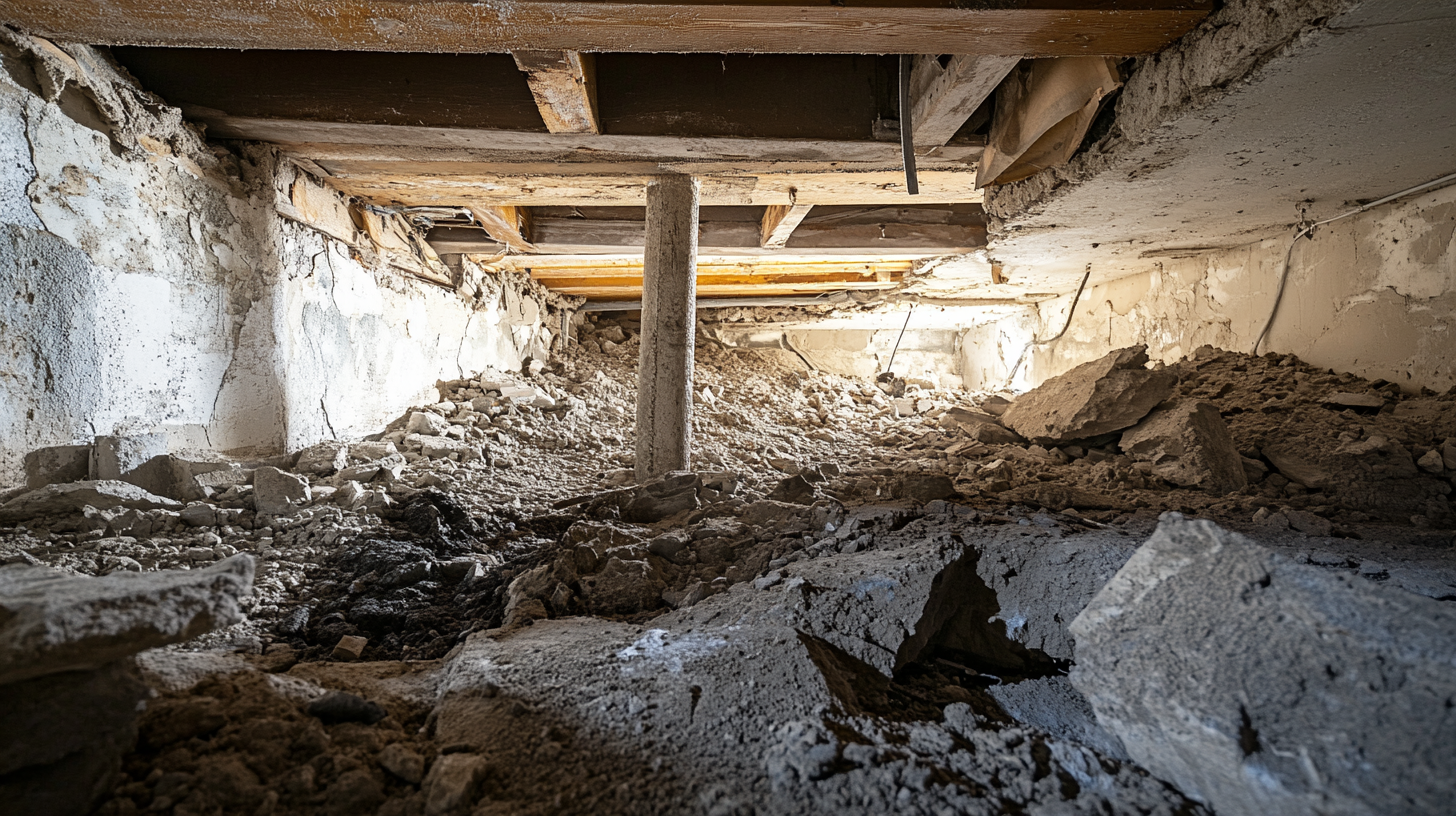
- Mold Growth: One of the most apparent signs of inadequate ventilation is the presence of mold on walls, ceilings, or floors. Mold thrives in moist environments, and its appearance can indicate high humidity levels and insufficient air circulation.
- Moisture Buildup: Condensation on windows, especially during colder months, can signal that indoor air is not circulating well and is too humid. Excessive moisture can also lead to peeling paint or wallpaper.
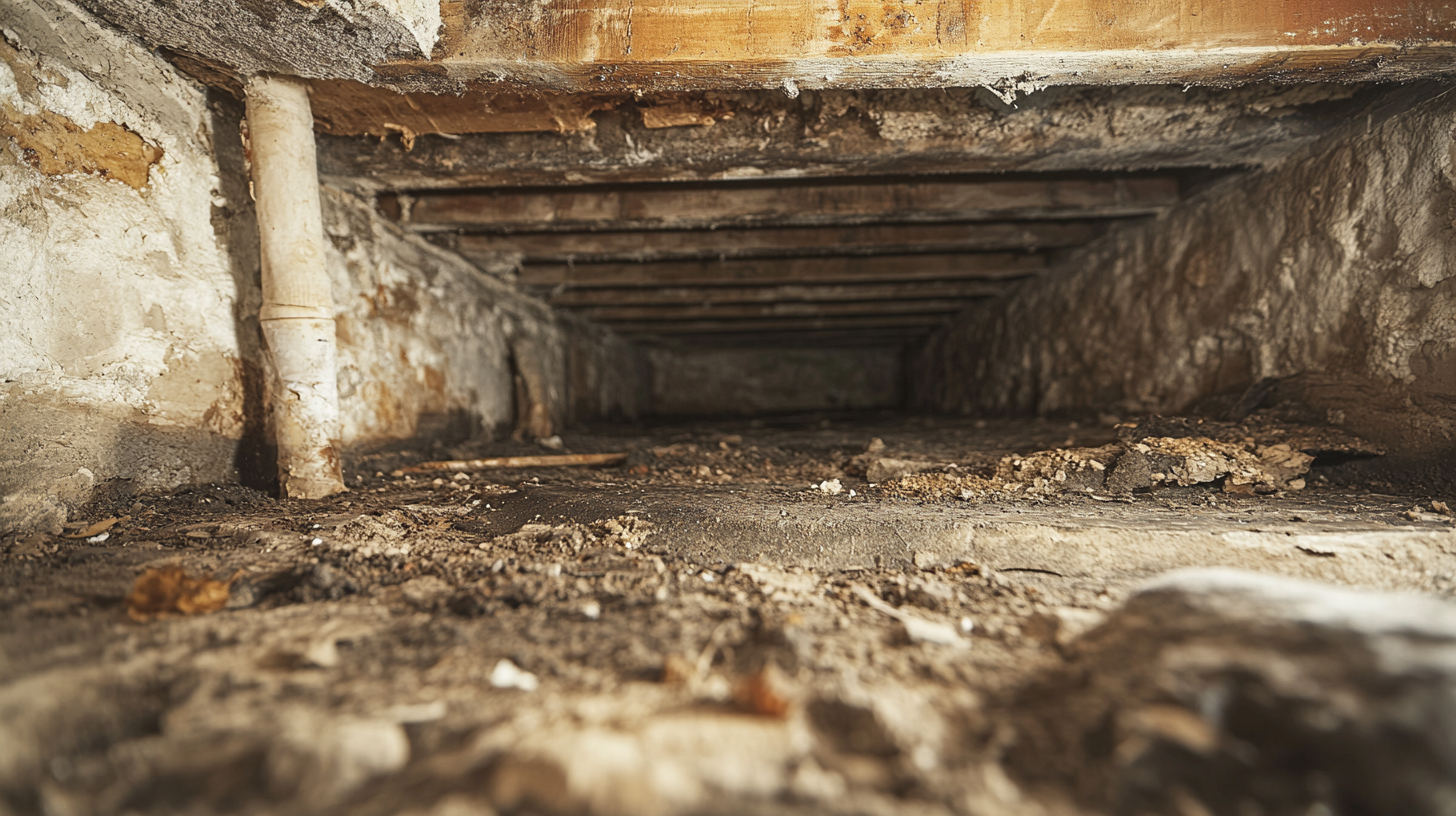
- Musty Odors: A persistent musty smell in certain areas of your home, particularly in basements, attics, or crawl spaces, can indicate stagnant air and the presence of mold or mildew, suggesting poor ventilation.
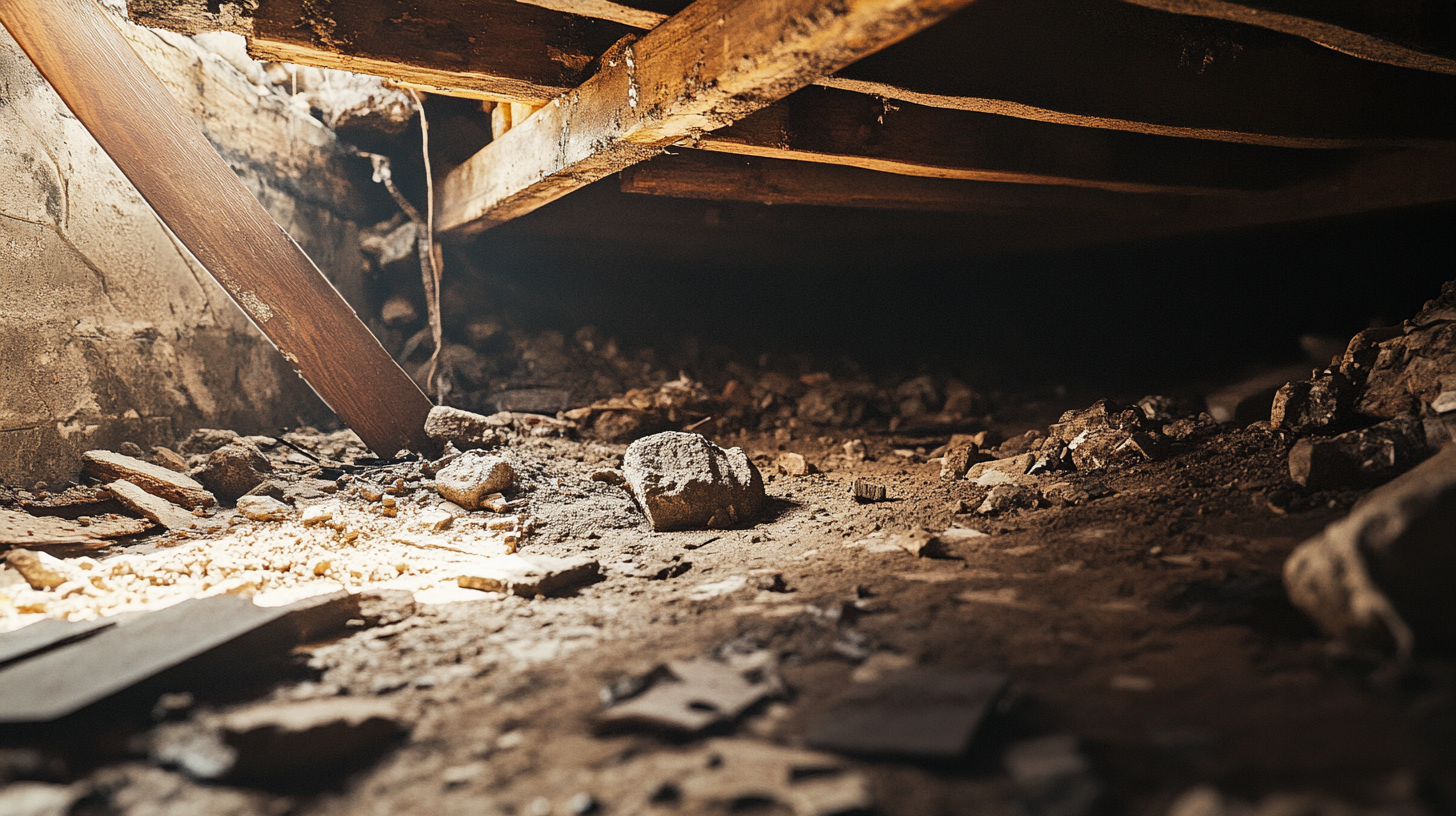
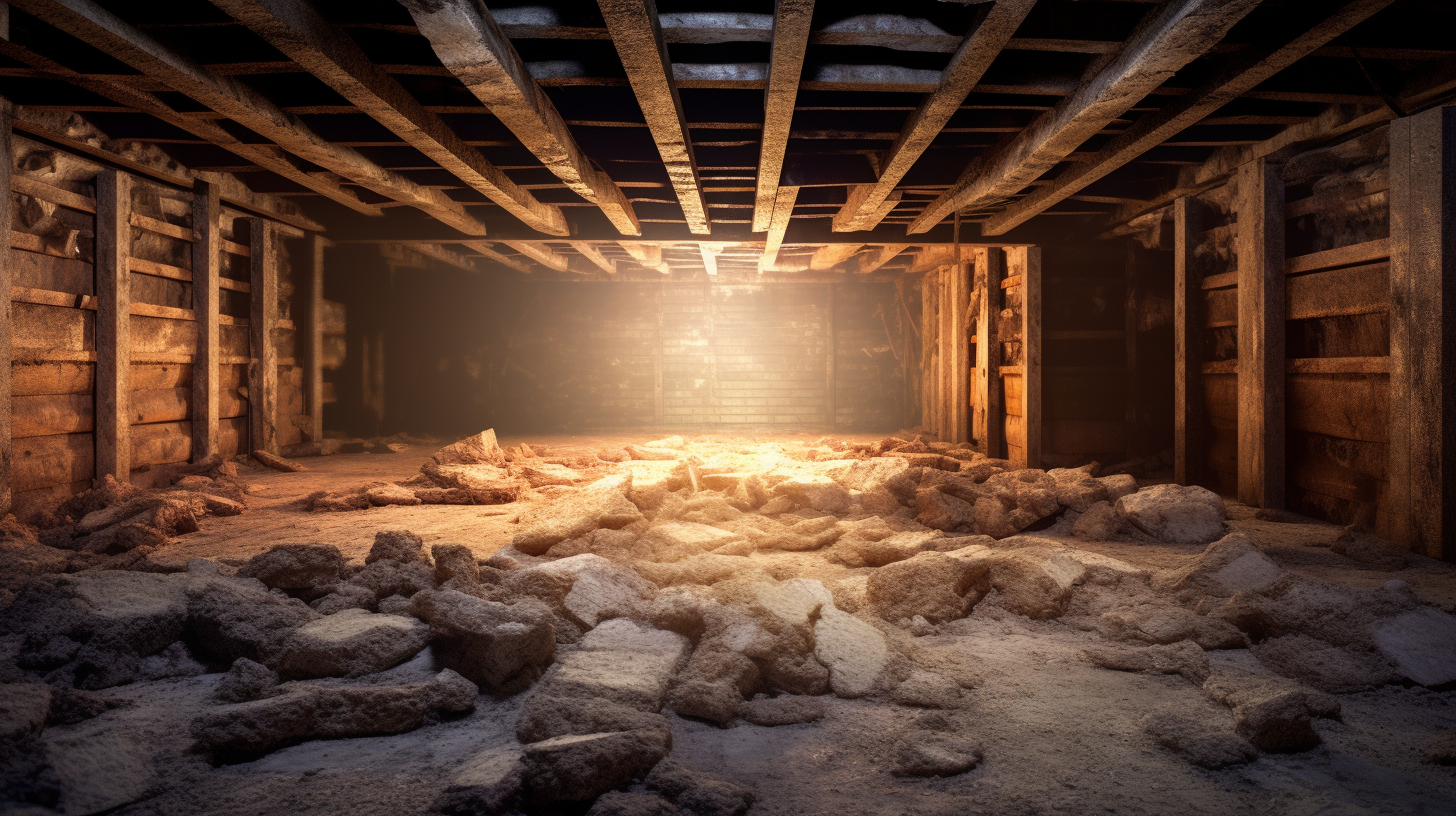
- Rotting Wood: Wooden structures exposed to high humidity levels without adequate ventilation can begin to rot. Check for soft spots or discoloration on wooden window frames, doors, and in the crawl space.
These visible signs are clear indicators that your home's ventilation system may not be functioning efficiently, leading to an environment conducive to mold growth and structural damage.
Sensing Air Quality Changes
Changes in air quality can be more subtle but equally indicative of ventilation issues. Pay attention to the following signs:
- Stale or Stuffy Air: If the air in your home feels stale or stuffy, it may indicate that it's not being adequately replaced with fresh outdoor air. Good ventilation helps to refresh the indoor air regularly.
- Allergy Symptoms: An increase in allergy symptoms or respiratory issues among household members can be a sign of poor indoor air quality due to insufficient ventilation. Pollutants, dust mites, and mold spores can accumulate in poorly ventilated homes, exacerbating these conditions.
- Uneven Temperatures: Inefficient ventilation can lead to uneven temperatures throughout your home, with some rooms feeling stuffy while others are too cold. Proper ventilation helps to distribute air evenly.
- Persistent Odors: Cooking smells, pet odors, or tobacco smoke that linger longer than usual can indicate inadequate ventilation. Efficient systems help to expel odors and pollutants, keeping indoor air fresh.
Recognizing these signs of inefficient ventilation is the first step toward addressing and mitigating potential issues. Whether it involves cleaning vents, adjusting your HVAC system, or considering more significant upgrades like installing new ventilation solutions, taking action can significantly improve your home's air quality, comfort, and overall health.
Conducting a Ventilation Efficiency Assessment
Ensuring your home's ventilation system operates efficiently is crucial for maintaining a healthy indoor environment and managing energy costs. Over time, systems can become less effective due to various factors, including blockages, damage, or changes in home layout. Conducting a ventilation efficiency assessment allows homeowners to identify areas for improvement. This guide provides DIY assessment techniques and outlines the tools and equipment needed to evaluate your system's performance.
DIY Assessment Techniques
Follow this step-by-step guide to assess the efficiency of your home's ventilation system:
- Visual Inspection: Begin with a thorough visual inspection of all accessible parts of your ventilation system, including vents, ducts, fans, and filters. Look for signs of blockage, damage, or wear that could affect performance.
- Check Airflow: Use your hand or a piece of lightweight paper to check airflow at each vent. Inconsistent airflow or noticeable lack of air movement can indicate blockages or issues with the system.
- Monitor Humidity Levels: Use a hygrometer to measure humidity levels in various areas of your home. High humidity levels can suggest inadequate ventilation, especially in areas like the bathroom, kitchen, and laundry room.
- Temperature Consistency: Assess whether your home maintains consistent temperatures, or if there are areas that feel stuffy or overly cold. Temperature inconsistencies can signal ventilation issues.
- Inspect Filters: Check the condition of your system's air filters. Clogged or dirty filters can significantly reduce ventilation efficiency. Replace or clean filters as recommended by the manufacturer.
- Evaluate External Factors: Consider any recent changes to your home, such as renovations or the addition of new furniture, that could impact airflow and ventilation efficiency.
Tools and Equipment Needed
To conduct an effective ventilation efficiency assessment, you'll need the following tools and equipment:
- Flashlight: For inspecting vents, ductwork, and other components in poorly lit areas.
- Hygrometer: To measure humidity levels in various parts of your home.
- Screwdriver: May be needed to remove vent covers or access panels.
- Lightweight Paper or Ribbon: Useful for a simple airflow test at vents.
- Mirror: Helps inspect hard-to-reach areas for mold growth or moisture accumulation.
- Camera or Smartphone: To document findings, especially in areas that require repairs or further inspection.
- Notepad and Pen: To record observations and measurements during the assessment.
Conducting a DIY ventilation efficiency assessment can empower homeowners to identify and address issues affecting their indoor air quality and comfort. While this guide covers basic techniques and tools, complex issues or concerns about your system's performance may require a professional evaluation. Regular assessments, combined with timely maintenance, can ensure your ventilation system remains effective and efficient.
Evaluating Ventilation Performance
Adequate ventilation in your crawl space is crucial for maintaining the structural integrity of your home, preventing moisture-related issues, and ensuring a healthy living environment. Understanding how to evaluate the performance of your ventilation system is key to identifying potential problems and making necessary adjustments. This guide focuses on methods for measuring airflow and using humidity and temperature readings to assess the effectiveness of your crawl space ventilation.
Airflow Measurement
Evaluating the airflow in your crawl space is essential for determining whether your ventilation system is functioning as intended. Here are methods to measure and evaluate airflow:
- Visual Inspection: Start with a visual inspection of all vents to ensure they are open, unobstructed, and in good condition. Blocked or damaged vents can significantly reduce airflow.
- Anemometer Use: An anemometer is a device used to measure wind speed and can be utilized to quantify airflow at crawl space vents. Compare readings at different vents to identify areas with reduced airflow that may require attention.
- Smoke Test: A smoke pencil or smoke test pen can help visualize airflow patterns in the crawl space. The direction and speed at which the smoke moves can indicate how well air is circulating.
- Airflow Indicators: Simple tools like ribbons or lightweight threads can also serve as basic airflow indicators. Attach them near vents; their movement will help you visually assess airflow presence and consistency.
Humidity and Temperature Monitoring
Monitoring humidity and temperature levels in your crawl space provides valuable insights into the effectiveness of your ventilation system:
- Hygrometer Use: A hygrometer measures the relative humidity in the air. Place hygrometers in various locations within your crawl space to monitor humidity levels. Consistently high readings above 60% relative humidity may indicate inadequate ventilation.
- Temperature Readings: Use a thermometer to take temperature readings in the crawl space. Significant temperature differences between the crawl space and the outdoor air can affect condensation and moisture levels, impacting ventilation effectiveness.
- Data Loggers: For a more comprehensive evaluation, consider using data loggers that can record humidity and temperature over time. Analyzing this data can help you identify trends, such as increases in humidity levels that correlate with specific weather conditions or times of the year, indicating when your ventilation may be insufficient.
- Professional Assessment: If your measurements indicate potential issues with airflow, humidity, or temperature that you cannot resolve, consulting with a professional can provide a more in-depth evaluation of your ventilation system's performance and recommend solutions.
By regularly measuring airflow and monitoring humidity and temperature levels in your crawl space, you can effectively evaluate the performance of your ventilation system. This proactive approach allows you to address any issues promptly, ensuring your crawl space remains well-ventilated, dry, and contributes to the overall health of your home.
Addressing Common Ventilation Problems
Effective ventilation is crucial for maintaining a healthy and comfortable home environment. However, homeowners often encounter common problems such as blockages, leaks, and outdated systems that can compromise ventilation efficiency. This guide offers practical solutions for dealing with these issues, ensuring your home's ventilation system operates optimally.
Dealing with Blockages and Leaks
Blockages and leaks in your ventilation system can significantly impact its performance, leading to poor air quality and moisture issues. Here are strategies for identifying and rectifying these problems:
- Identifying Blockages: Regularly inspect vents, ducts, and intake/exhaust points for any signs of blockage. Common culprits include dust buildup, debris, nests, or even furniture and curtains obstructing airflow. Use a flashlight to examine ductwork and vents for obstructions that may not be immediately visible.
- Clearing Blockages: Once identified, carefully remove any blockages. For vents and accessible parts of ductwork, a vacuum with a hose attachment can effectively remove dust and debris. For more significant blockages or those within the ductwork, consider hiring a professional duct cleaning service to ensure thorough cleaning without damaging the system.
- Detecting Leaks: Leaks in ductwork or around vents can allow conditioned air to escape, reducing system efficiency. Perform a visual inspection for any signs of wear or damage. You can also use the smoke from an incense stick near suspected leak points; the smoke's movement can indicate air leaks.
- Repairing Leaks: Small leaks can often be sealed with duct tape or mastic sealant. However, for larger leaks or damage, replacement of the affected duct section may be necessary. Professional assistance is recommended for complex repairs to ensure they are performed correctly.
Upgrading Outdated Systems
Outdated ventilation systems may not meet the efficiency or air quality standards of modern homes. Here are considerations for upgrading your system:
- When to Upgrade: Consider upgrading if your system is over a decade old, struggles to maintain air quality, or frequently requires repairs. Additionally, if your energy bills are consistently high due to the ventilation system's inefficiency, an upgrade can be a cost-effective solution in the long term.
- Assessing Needs: Evaluate your home's specific ventilation needs based on its size, layout, and any unique challenges such as high humidity levels or indoor pollutants. This assessment will help determine the type of system that best suits your home.
- Exploring Options: Research the latest ventilation technologies, including energy-efficient models, systems with integrated humidity control, and smart ventilation solutions that automatically adjust airflow based on indoor air quality sensors.
- Professional Consultation: Before making any decisions, consult with a ventilation expert or HVAC professional. They can provide valuable insights into the most effective systems for your home and ensure that any new installation is compatible with your existing HVAC infrastructure.
By proactively addressing blockages, leaks, and considering upgrades to outdated systems, homeowners can significantly improve their ventilation efficiency. These steps not only enhance indoor air quality and comfort but also contribute to energy savings and the overall well-being of the household.
FAQs
Contact Trench Guys Today!
Trench Guys will do everything we can to ensure your experience with us is excellent.
Request A FREE Estimate
Request a Free Estimate Form
Checkout Recent Post
Got a Question? We’re Here to Help.
You can arrange an appointment or make an enquiry by phone or email, orget in touch to us via our contact form.