
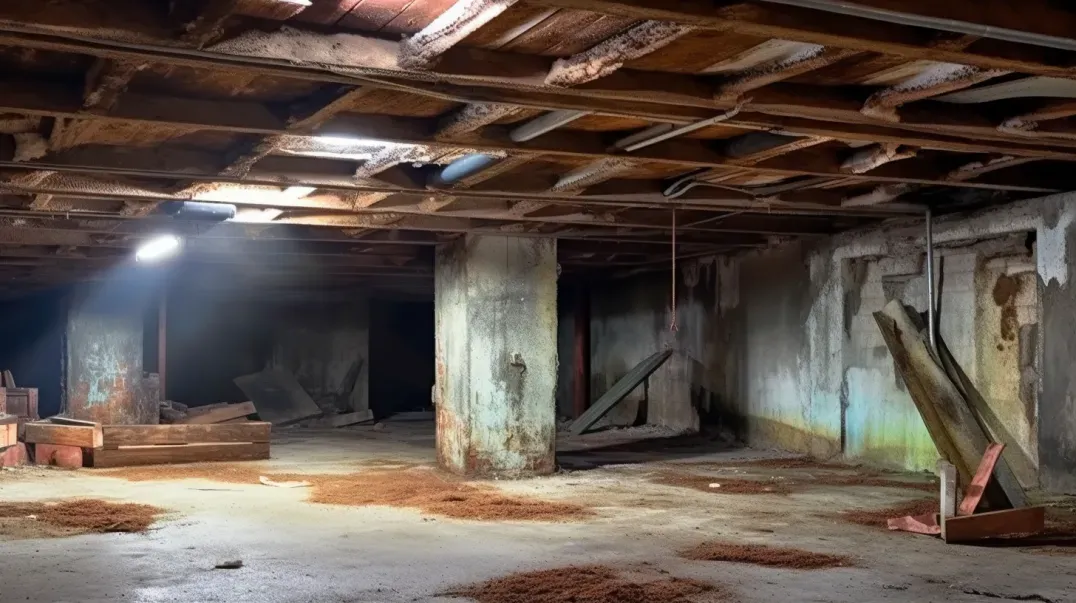
In the intricate ecosystem of a home, crawl spaces are often the unsung heroes, quietly influencing the overall health and comfort of the living environment. Yet, the significance of proper crawl space ventilation is frequently overlooked, despite its pivotal role in safeguarding the structural integrity of our homes and ensuring the well-being of its inhabitants. This blog embarks on a journey to uncover the hidden importance of crawl space ventilation, shedding light on how this vital aspect of home maintenance can have far-reaching effects on your living space.
Proper ventilation in crawl spaces is not merely a matter of regulatory compliance; it is a cornerstone of a healthy home. It serves as the first line of defense against a myriad of issues that can compromise both the structure of your home and the quality of the air you breathe. From controlling moisture levels to preventing the growth of mold and mildew, and deterring pests, the benefits of efficient crawl space ventilation are manifold.
However, common issues such as inadequate airflow, excessive moisture, and the presence of contaminants can disrupt this delicate balance, leading to a host of problems. These challenges not only threaten the structural durability of your home by promoting wood rot and undermining foundations but also pose significant health risks through the proliferation of mold spores and other allergens.
Through a comprehensive overview, this blog aims to elevate your understanding of crawl space ventilation, highlighting its indispensable role in maintaining a healthy, safe, and comfortable home. We will delve into the common issues faced in crawl space ventilation, exploring their causes, impacts, and, most importantly, the solutions that can help mitigate these risks.
Join us as we navigate the complexities of crawl space ventilation, offering insights and guidance to ensure your home remains a sanctuary of health and comfort. Whether you're a seasoned homeowner or new to the nuances of home maintenance, this guide will arm you with the knowledge needed to tackle crawl space ventilation challenges head-on, ensuring your home stands strong and healthy for years to come.
Identifying Crawl Space Ventilation Problems
A healthy home environment starts from the ground up, with the crawl space playing a crucial role in maintaining the structural integrity and air quality of your living space. However, identifying problems with crawl space ventilation can be challenging. By recognizing the signs of poor ventilation and understanding its common causes, homeowners can take proactive steps to address these issues, ensuring their home remains a safe and comfortable haven.
Recognizing Signs of Poor Ventilation
Effective ventilation in the crawl space is essential for preventing moisture-related issues and ensuring good air quality throughout your home. Key indicators that suggest your crawl space may be suffering from poor ventilation include:
- Mold Growth: The presence of mold or mildew in your crawl space is a clear sign of excessive moisture and inadequate ventilation. Mold thrives in damp environments, and its spores can negatively impact indoor air quality and health.
- Musty Odors: A persistent musty smell emanating from your crawl space is indicative of stagnant air and moisture problems. These odors can permeate your living spaces, creating an unpleasant living environment.
- Increased Humidity: High humidity levels in your crawl space can lead to condensation, which in turn can cause wood rot, metal corrosion, and other moisture-related damages. A hygrometer can help you monitor humidity levels and identify ventilation issues.
Identifying these signs early can prevent more significant problems down the line, such as structural damage or health issues caused by poor air quality.
Causes of Ventilation Problems
Understanding the root causes of ventilation problems in your crawl space is the first step toward finding effective solutions. Common causes include:
- Blocked Vents: Vents blocked by debris, insulation, or external obstructions can significantly reduce airflow, leading to poor ventilation.
- Inadequate Vent Size: Vents that are too small for the size of your crawl space cannot provide adequate air exchange, resulting in moisture buildup and related issues.
- Mechanical Failures: For homes equipped with mechanical ventilation systems, failures or malfunctions can lead to inadequate ventilation. Regular maintenance is crucial to ensure these systems function correctly.
Addressing these causes requires a thorough inspection of your crawl space to identify any obstructions, assess vent sizes, and check the condition of mechanical systems. In some cases, professional evaluation may be necessary to develop a comprehensive solution that ensures proper ventilation.
Addressing Blocked or Inadequate Vents
Ensuring that your crawl space vents are clear and adequately sized is crucial for maintaining the health and structural integrity of your home. Blocked or insufficient vents can lead to a host of problems, including poor air quality, moisture issues, and the potential for mold growth. Here’s how you can address these common issues effectively.
Clearing Obstructions
Blocked vents can significantly impede the airflow in your crawl space, leading to increased humidity and the problems that come with it. Here's a step-by-step guide to safely clear these obstructions:
- Safety First: Before inspecting or cleaning your crawl space vents, wear appropriate safety gear, including gloves, a mask, and protective eyewear.
- Inspect Vents: Visually inspect each vent from the outside of your home. Look for visible signs of blockage, such as leaves, dirt, or debris.
- Remove Debris: Carefully remove any debris blocking the vents using a brush or a vacuum designed for outdoor use. Be gentle to avoid damaging the vent screens.
- Check Screens: Ensure that vent screens are intact to prevent pests from entering. Replace any torn or damaged screens.
- Interior Check: If possible, inspect the vents from the inside of the crawl space to ensure no internal obstructions or damage.
- Regular Maintenance: Make clearing vent obstructions part of your regular home maintenance routine to ensure ongoing ventilation efficiency.
Assessing and Improving Vent Size
Proper vent sizing is essential for effective crawl space ventilation. Here’s how to assess and improve your vent size:
- Evaluate Current Vents: The general rule of thumb for vent size is 1 square foot of vent area for every 150 square feet of crawl space. Measure your crawl space and vents to determine if they meet this standard.
- Consult Building Codes: Check local building codes for specific ventilation requirements, as they can vary by location and may have changed since your home was built.
- Consider Upgrades: If your vents are inadequate, consider installing additional vents or enlarging existing ones to improve airflow. This may require professional assistance to ensure it's done correctly and safely.
- Explore Alternatives: In some cases, mechanical ventilation systems may be a more effective solution, especially in areas with high humidity levels or where traditional venting is not feasible.
- Professional Assessment: If you’re unsure about the adequacy of your vent size or how to improve it, consult with a professional. They can provide a detailed assessment and recommend the best solutions for your specific situation.
Controlling Moisture and Humidity
Maintaining optimal moisture and humidity levels in your crawl space is essential for preserving the structural integrity of your home and ensuring a healthy living environment. Excess moisture can lead to a host of problems, including mold growth, wood rot, and attracting pests. Here’s how you can effectively control moisture and humidity in your crawl space.
Dealing with Excess Moisture
Excess moisture in your crawl space can originate from various sources, including ground evaporation, external water intrusion, and condensation. Implementing the following strategies can help reduce moisture levels:
- Improve Drainage: Ensure that the ground around your home slopes away from the foundation to prevent water from pooling near your crawl space. Adding gutters and downspouts can also help divert water away from your home.
- Vapor Barrier Installation: Laying a vapor barrier on the crawl space floor can prevent moisture from the ground from evaporating into the crawl space air.
- Ventilation Improvement: Ensure your crawl space is adequately ventilated to allow moist air to escape and fresh air to circulate. This may involve clearing blocked vents or adjusting vent sizes as necessary.
- Repair Leaks: Inspect for and repair any plumbing leaks within your crawl space. Even small leaks can contribute significantly to moisture problems.
- Encapsulation: For high moisture levels, consider encapsulating your crawl space. This involves sealing it off from the outside environment and often integrating a dehumidifier to control humidity.
Integrating Dehumidifiers
Dehumidifiers can play a crucial role in your crawl space ventilation strategy, especially in areas prone to high humidity. Here’s when and how to use dehumidifiers effectively:
- Assess Humidity Levels: Use a hygrometer to measure the humidity level in your crawl space. If it consistently exceeds 60%, a dehumidifier may be necessary to maintain healthy levels.
- Choose the Right Size: Select a dehumidifier that is appropriately sized for your crawl space. A unit too small won’t effectively reduce humidity levels, while a too-large unit may use unnecessary energy.
- Proper Placement: Position your dehumidifier in a central location where air can circulate freely around it. Ensure it's accessible for maintenance and emptying the water collection container, if applicable.
- Regular Maintenance: Clean and maintain your dehumidifier according to the manufacturer's instructions to ensure it operates efficiently.
- Monitor Performance: Regularly check humidity levels with a hygrometer to ensure your dehumidifier is effectively controlling moisture in your crawl space.
Upgrading Ventilation Systems
Ensuring your home has an efficient and effective ventilation system is crucial for maintaining air quality, controlling moisture, and providing a comfortable living environment. Over time, the needs of your home can change, or your existing system may no longer perform optimally. Understanding when to upgrade your ventilation system and familiarizing yourself with modern solutions can help you make informed decisions for your home.
When to Upgrade
Several signs indicate your current ventilation system may be insufficient and in need of an upgrade:
- Increased Humidity Levels: Persistent high humidity in your home, despite using your current system, suggests it's not effectively managing moisture.
- Poor Air Quality: If you notice persistent odors, increased allergy symptoms, or a general decline in indoor air quality, your ventilation system may not be adequately removing contaminants.
- Visible Mold Growth: The presence of mold inside your home can indicate that your ventilation system is failing to control moisture levels.
- Energy Inefficiency: An increase in energy bills without a corresponding increase in usage could suggest that your ventilation system is working harder than it should, indicating inefficiency or inadequacy.
- Home Renovations: Changes to your home's layout or size can alter the demands on your ventilation system, necessitating an upgrade to accommodate the new space.
Recognizing these signs early can help you take proactive steps to upgrade your system, ensuring it meets your home's needs effectively.
Modern Ventilation Solutions
Advancements in technology have led to a variety of modern ventilation solutions designed to improve efficiency, control humidity, and enhance air quality. Some of these include:
- Heat Recovery Ventilators (HRVs) and Energy Recovery Ventilators (ERVs): These systems efficiently exchange stale indoor air with fresh outdoor air, recovering heat or energy in the process. They are particularly effective in climates with extreme temperatures, helping to maintain comfortable indoor conditions without a significant increase in energy costs.
- Smart Ventilation Systems: Equipped with sensors and smart controls, these systems can adjust airflow based on real-time indoor air quality, occupancy, and even weather conditions, optimizing energy use and improving comfort.
- Ductless Ventilation Systems: For homes without traditional ductwork, ductless systems offer an efficient way to circulate fresh air, control humidity, and reduce contaminants.
- Whole-House Dehumidifiers: Integrated into your ventilation system, these dehumidifiers can more effectively control humidity levels throughout your home, compared to standalone units.
Choosing the right ventilation solution depends on your home's specific needs, climate, and existing infrastructure. Consulting with a professional can help you assess your current system and recommend the most suitable upgrade options.
DIY Maintenance and Repairs
Maintaining a healthy and efficient home environment involves regular checks and upkeep of your ventilation system. While some tasks may require professional assistance, many maintenance and simple repair tasks can be safely handled by homeowners. Empowering yourself with the knowledge to perform these tasks can help extend the life of your system, improve air quality, and potentially save on costly repairs.
Routine Ventilation Checks
Regular inspections and maintenance are crucial for ensuring your ventilation system operates efficiently and effectively. Here are guidelines for conducting routine checks:
- Visual Inspections: Every few months, visually inspect ventilation outlets, intakes, and ductwork for any signs of blockage, damage, or wear. Look for debris, dust buildup, or any obstructions that could impede airflow.
- Filter Replacement: Check your system's filters every 1-3 months. Dirty or clogged filters can significantly reduce system efficiency and air quality. Replace or clean filters as recommended by the manufacturer.
- Ductwork Cleaning: While a comprehensive duct cleaning might require a professional, homeowners can clean accessible parts of ductwork using a vacuum cleaner with a hose attachment to remove dust and debris.
- Vent Cleaning: Regularly clean vents and exhausts to prevent blockages. This can be done with a vacuum cleaner or by wiping down the vents with a damp cloth.
- System Testing: Periodically check that all components of your ventilation system are functioning correctly. This includes fans, dehumidifiers, and any mechanical parts. Listen for unusual noises or vibrations that could indicate a problem.
Simple Repairs Homeowners Can Do
Some common issues with ventilation systems can be addressed with basic DIY repairs:
- Sealing Leaks in Ductwork: Use mastic sealant or metal tape to seal any visible leaks or gaps in ductwork. This can improve efficiency and prevent loss of conditioned air.
- Replacing Worn Gaskets or Seals: Over time, gaskets or seals on vents and exhausts can become worn. Replacing these can often be a simple task that ensures a tight seal and prevents air leaks.
- Unclogging Vents and Exhausts: Remove any visible blockages in vents or exhausts, such as lint, leaves, or nests, to ensure proper airflow.
- Adjusting or Replacing Vent Covers: If vent covers are damaged or not properly adjusted for optimal airflow, replacing or adjusting them can be a straightforward task.
- Tightening Loose Components: Over time, screws and fasteners on ventilation components can become loose. Tightening these can prevent rattling noises and ensure components are securely attached.
FAQs
Contact Trench Guys Today!
Trench Guys will do everything we can to ensure your experience with us is excellent.
Request A FREE Estimate
Request a Free Estimate Form
Checkout Recent Post
Got a Question? We’re Here to Help.
You can arrange an appointment or make an enquiry by phone or email, orget in touch to us via our contact form.